
Using weatherstripping in your home to seal air leaks is a simple and effective way to improve energy efficiency and save money on heating bills. Weatherstripping can also protect the integrity of your home’s insulation by preventing warm, moist air from escaping through it.
But before you take a trip to your local hardware store, first inspect your doors and windows for air leaks. It may also be helpful to measure the perimeters of all the places you plan to install weatherstripping, to get an idea of how much you should purchase.
There are several types of weatherstripping available at the hardware store. The most common are felt, adhesive-backed foam; vinyl “V” strips; and door sweeps. A quick review of hardware stores found that felt and foam weatherstripping run between $3 and $10. Vinyl V strips cost a range of about $5 to $25, and a door sweep costs about $15 to $40.
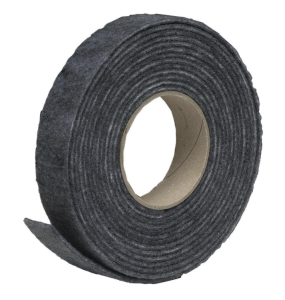
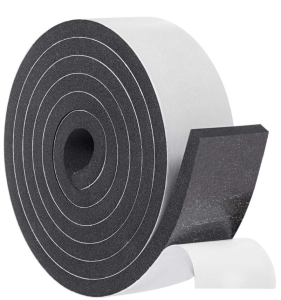
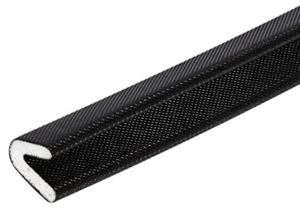
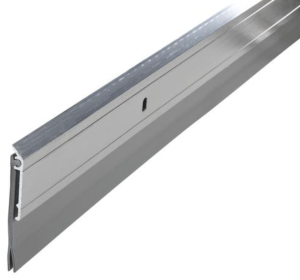
From left to right: Felt, adhesive-backed foam, vinyl V weatherstripping and a door sweep
Be sure to choose the correct type of weatherstripping for the area of your house you are sealing by taking into account potential exposure to moisture, wear and tear and weather changes. Check out the Department of Energy’s helpful fact sheet on choosing weatherstripping and installation.
Installing weatherstripping can be relatively simple (depending on what type you’ve chosen). Refer to the product’s instructions for best practices with your specific type of weatherstripping.
Before installing, prepare your home surfaces by cleaning them with soap and water, and allowing them to dry completely.
Windows
If you are using foam tape for your windows, apply weatherstripping to the fixed frame that supports the glass, also known as a sash. Repeat this step for as many windows as necessary. When the windows in your home are closed, the foam’s airtight barrier will prevent cold air from coming in and warm air from escaping through the window frame.
Tip: Foam tape can wear down with constant friction, so be sure to periodically check on the condition of your weatherstripping and replace as necessary.
Many homeowners choose to use vinyl V strips for double-hung or sliding windows instead of adhesive-backed foam. Open the window by pulling the bottom sash up as far as it can go and cut a piece of weather stripping the length of the opening. Remove the backing and push the weatherstripping into place. Repeat this step with the upper sash. When the window is closed, the “V” will close and create an airtight seal.
There are a lot of online resources to show you how window weatherstripping works, such as this Lowe’s step-by-step guide. Also, watch this video from Mr. Hardware’s YouTube channel.
Doors
If you elect to use foam tape for your doors, apply one strip on each side along the length of the door. Ensure the tape fits securely and tightly at the corners.
You may instead choose to install a door sweep. Place the sweep against the exterior of your door so that there is no light coming through. With the sweep in place, mark the location of the holes in the sweep onto your door so that they align correctly. Use a drill to make pilot holes in your door. Lastly, realign your door sweep and use a screwdriver to tightly secure the sweep to the door with the provided screws.
Again, there are a lot of helpful online resources on how to install door sweeps: Home Depot, Lowes, and Mr. Hardware, for example.
Remember: Properly applied weatherstripping should seal air leaks, but still allow doors and windows to open and close freely.
For more cold-weather tips, read our WatchBlog on preparing your home for winter.